Building an app is a backbreaking job. However, the complex process of birthing and shipping your newly developed iOS app doesn’t stop once it’s finished. Getting your app published in the App Store is the next step; hence, understanding Apple’s terms and complying with them will ensure your app gets published.
So, the hard work and long nights are over; you’re done building your iOS app. You committed countless hours and invested valuable resources in planning, designing, developing, and testing your app. You and your team detected and fixed every bug and made sure the UX/UI design works seamlessly across every device. The idea that started as an abstract concept on a board or a scribble on a piece of paper is now a reality that makes you proud. It all sounds great and exciting, but now what? Well, your iOS app’s successful journey into your users’ phones truly begins when it goes out into the world. And, as you already know, the gateway to your iOS app’s newfound global success is Apple’s App Store.
It all sounds pretty straightforward: you build your app, get it on the App Store, the downloads start coming in, and voila! Instant success. Unfortunately, submitting your app to the App Store isn’t as simple as clicking an upload button. However, it isn’t as complicated as it seems either. Still, before you can see your app killing it on the App Store, you need to follow some technical and legal guidelines and meet Apple’s prerequisites and requirements for app publishing.
You’ve probably heard that Apple is somewhat picky when accepting apps into their platform; however, these requirements aren’t impossible to meet. Sure, Apple does make it a bit harder than Google, but with the proper guidance and preparation, getting approval for your app’s inclusion into the App Store is doable and worth it. That’s the primary goal of this article. As experienced iOS app developers, we at Foonkie Monkey will try to outline and explain the steps and requirements you must consider and comply with to help your app land a coveted spot on Apple’s popular mobile platform.

Before Submitting Your App to Apple’s App Store
Before we dive into the App Store’s submission process, we thought it relevant to glance at some of Apple’s prerequisites that, if addressed beforehand, can simplify things for you and your team. These prerequisites are essential to go into submission fully prepared and avoid rejection and other issues that can hamper your app’s inclusion in the App Store. Remember, last year, Apple rejected over 1 million apps, about 35% of all app submissions, for lack of compliance with their legal and technical requirements, so meeting them and complying with them is non-negotiable if the spotlight in the App store is what you’re after.
Enroll in Apple’s Developer Program
First and foremost, to be cleared to submit apps to Apple’s App Store, you must create an account in the Apple Developer Program. It will set you back $99 per year and $299 for a team account, which seems steep compared to Google’s one-time fee of $25. However, keep in mind that, in 2020, iOS apps made up almost 62% of the total app revenue for that year, whereas Android apps accounted for a mere 38%. Additionally, Apple’s Developer Program will give you access to various benefits, including:
- Free submission of all your apps to the App Stores on all Apple platforms
- Access to publicly beta test apps with TestFlight.
- Ability to create Safari extensions.
- Access to Beta builds of all Apple software products (iOS, iPadOS, macOS, watchOS, and tvOS).
- Integration with Xcode.
- Access to Apple Store Connect’s advanced app analytics and advanced app capabilities.
If you’re planning to build many more iOS apps, signing up for the Developer Program is worthwhile. With its 1.96 million apps available for download, Apple’s App Store is an invaluable platform for your app. However, if you don’t want to sign up, you can still build apps for Apple’s operating systems. Still, you won’t have access to all the benefits listed above, and the apps you create will be tied to your device because you won’t have any natural way of distributing or monetizing them. Additionally, keep in mind that Apple will remove your apps from the App Store if you decide to sign up but don’t renew your membership once the year is over.
Once you’ve got your Apple Developer account set up, you’ll need to connect it to Xcode if you haven’t already, and create three things that you’ll use later on when you’re submitting your app for review:
- Distribution certificate: A distribution certificate identifies you and your team–or organization–, makes sure your app’s code originates from you. It also allows you to submit all of your iOS apps to the App Store. You can get your distribution certificate directly in your developer account in the Certificates, IDs & Profiles menu.
- App ID: The app ID is the unique identifier of your app or set of apps and helps determine which apps are authorized to be signed and published. Your app’s ID has two parts: the bundle ID and the team ID. A bundle ID is a set of characters used to identify a specific app, whereas the team ID is a 10-character string generated by Apple. A unique team ID is assigned to your development team and is used to identify all your apps. You can create your App ID directly in your developer account in the Certificates, IDs & Profiles menu.
- Provisioning profile: As you know, only apps signed by Apple can be installed on iOS devices, meaning that testing on real devices before deployment can be an issue. Creating a provisioning profile solves this problem by allowing you to run your app on specifically authorized devices before Apple signs it. You must create a provisioning profile for each app, and you can generate it directly in your developer account in the Certificates, IDs & Profiles menu.
Get Your App Ready for Submission
After you’ve created your developer account, you need to make sure your app is ready and meets specific guidelines and technical requirements before it’s all set to go in for review. Here are some of these considerations to keep in mind when getting your iOS ready for submission:
App Store Guidelines: Make sure your app follows Apple’s App Store Review Guidelines. Your app will undergo a thorough review and certification process to ensure it complies with all these guidelines and rules. Apple’s reviewers will judge your app under the umbrella of these specifications, hence the importance of this step for getting your app approved. So, you must make sure your iOS app’s safety and security protocols work seamlessly. If your app crashes, has bugs, and is vulnerable to hacking and data leaks, it will not get approved for publishing in the App Store, which is why you must make sure your testing protocols are flawless.
Luckily, you have access to Apple’s TestFlight, an excellent tool for beta testing your app with your developer account. Additionally, your UX/UI design must be flawless and smooth, your app’s copyright and other legal requirements, if any, must be met, and make sure the overall performance of your app is on-point.
Human Interface Guidelines: Apple’s Human Interface Guidelines outline how developers should design the User Interface (UI) elements of apps that run on iOS devices. They include accepted resolutions, themes, design principles, image sizes, pixels, and other UI resources established by Apple in a search for easy and seamless integration of apps across all iOS devices.
Development Requirements: As you probably already know, to develop native iOS apps, you need a Mac computer that can effectively run MacOS X and has the latest version of Xcode installed, which in this case should be Xcode 13. Xcode is Apple’s IDE (Integrated Development Environment) for developing both Mac and iOS apps. It is the graphical interface you and your team should be using to deliver your iOS app. In addition, Xcode includes the iOS SDK (iOS Software Development Kit), supports Swift programming language, and has all the tools, compilers, and frameworks you’ll be needing to design, develop, and debug your brand new iOS app.
Legal Requirements: Aside from meeting the submission guidelines exposed earlier, the iOS app you submit to Apple’s App Store must comply with all the legal requirements from the location where it will be available. For instance, in the US, depending on the type of app you’re submitting, you must comply with HIPAA laws or the FTC (Federal Trade Commission) regulations. In EU countries, on the other hand, there are the PSD2 and the GDPR directives to abide by. Remember, Apple pays close attention to how well you handle and protect your users’ data and will indeed reject your app if it doesn’t meet their Developer Program License Agreement.
The Process of Submitting Your App to Apple’s App Store
Hopefully, by now, you’ve designed, developed, and tested your app, and you and your team are fully prepared and have all the information and tools you need to start your iOS app’s submission process. So, without further ado, here’s an overview of the process of launching your app in Apple’s App Store.
1. App Store Connect
Once your developer account is all set up, and you’ve created the elements mentioned earlier and reviewed the guidelines and requirements, log into your App Store Connect account. Once there, it’s time to get started on submitting your app by going to the MyApps menu and clicking the “+” to add your new app. Once there, you’ll have to register your app’s preferred platform, name, primary language, user access, and the app’s ID and bundle ID that you created earlier. Afterward, the system will direct you to your app’s product page, where you’ll need to provide your app’s metadata and other detailed information about your app, which includes:
- Privacy Policy URL.
- App name, subtitle, and keyword optimization
- Pricing and territorial availability (in which countries will your app be available)
- Category (Games, fitness, healthcare, etc.)
- Your app’s icon (it should be 024px x 1024px).
- Your app’s version number (1.0.0 if it’s a new app)
- Copyright information and other intellectual property identifiers
- Contact and support URLs
- Minimum user age
- Your app’s age rating (everyone, teen, adults-only, etc.)
- Release options: You can choose how and when your app should be released if it passes Apple’s review process. You can select a specific release date, Automatic release once it’s approved, or you can do it manually.
- Review information: If your app requires authentication methods for users to access it, you will need to create a testing account and provide demo credentials.
2. Upload Screenshots
For your iOS app to get approved by Apple’s App Store, you will need to submit screenshots for your app’s different devices following Apple’s screenshot required specifications. You can upload up to 10 screenshots of your app, making sure that you select the ones that best capture your app’s UX design. These screenshots are crucial because they will show up on your app’s page and will be the first visually appealing thing your users will see when searching for your app; hence, they must be attractive, simple, clean, and eye-catching. You can easily capture them using an iOS emulator, or you can design some images or mockups that successfully convey and layout the look and feel of your app. You can use graphic design tools such as Figma or Sketch paired with smartphone mockup tools such as Mockuphone to design these mockups.
3. Upload Your App’s Build
Once you’ve successfully reached this point and you’re confident your app is bug-free and has no security holes, you’re ready to upload it. However, you can’t upload your app directly to App Store Connect, so you’ll need to use Xcode to archive your app and upload it to complete this step correctly. Simply go to Xcode and select “Generic iOS Device” as the deployment target. Next, choose “Product” from the menu and click on Archive to begin the process. Archiving your app in Xcode might take a while because it uses the release settings to enable your app to run on all your selected iOS devices.
Once Xcode archives your app, you can choose it from the organizer window and upload it to App Store Connect via the Distribute App option, selecting the App Store option. By now, you already have the distribution certificate, so your app should upload with no problems. Still, Xcode will let you know if there are any issues and will alert you once this step is completed.
Afterward, you can go back to your App Store Connect account, click on “1.0 Prepare for Submission” on the left-hand side of the dashboard. Next, click on the “+” button and select the build you recently uploaded in Xcode. Once you choose your app’s build, a dialog box will ask if your app uses encryption. Select the answer that fits your app’s security protocols and hit Next to finish the process. Finally, click the Done button at the bottom right-hand corner, then Save in the top-right hand corner, and you’re all set.
4. TestFlight Beta Testing
Depending on your purpose, you might not want to submit your app to the App Store immediately. Instead, you may want to run a beta test on your app using TestFlight. In this case, the entire process is the same, except before archiving your app’s build in Xcode; you’ll need to create an App Store distribution profile for beta testing instead of the App Store.
5. Review and Submit
After you’ve uploaded your app and completed all the steps mentioned previously, you’re almost done. First, however, we recommend you do a final check of all the information you’ve lost because editing is not an option once your submission is sent. After you’re ready, click the Save button on the top right of the screen and then click the Submit for Review button. Afterward, you’ll be prompted to answer some questions regarding export compliance, content rights, and advertising; answer depending on your app’s characteristics. Now, you should see a yellow tag next to your app’s name that shows that it’s pending review. And voila, now you’re done!
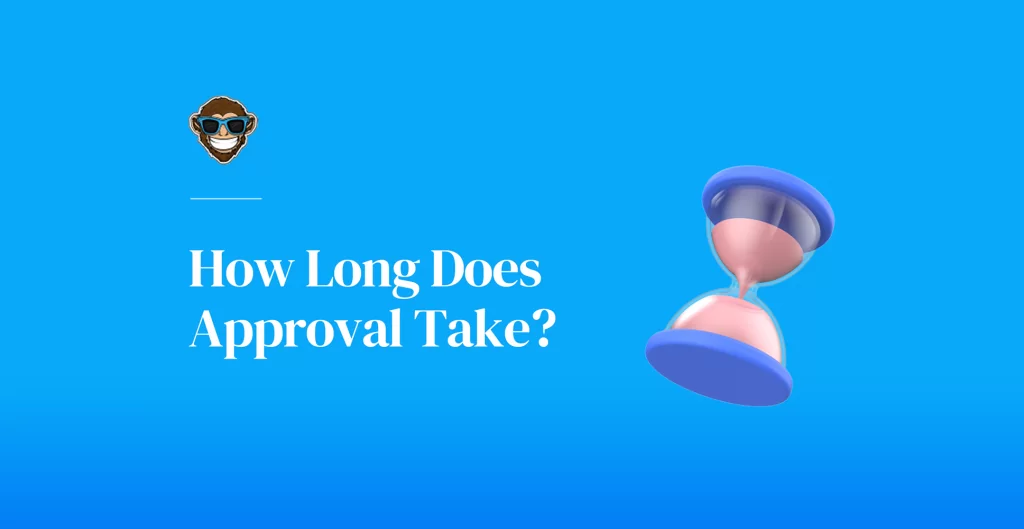
How Long Does Approval Take?
Once you’ve submitted your app, the waiting game begins. Apple’s review times greatly vary; they can take a couple of days or take a couple of weeks. Nonetheless, recently Apple has allegedly improved its reviewing times, with 50% of apps being reviewed in 24 hours and over 90% within 48 hours. Whichever the case, the key here is patience. If you followed the steps correctly and made sure your app met all Apple’s guidelines and requirements, then approval is undoubtedly underway.
However, if your app has been in review for over two weeks and you haven’t heard back, you can contact Apple using the Resolution Center in your App Store Connect account or re-submit your app. Still, if your app is rejected, Apple will notify you by email. Your app’s rejection notice will include information about the reasons for rejection so that you can fix the errors and try submitting your app again. However, if you disagree with the rejection reasons, you can always appeal. If your app is approved, you’ll also receive a confirmation via email and, unless specified otherwise, it will go live 24 hours after it has been approved.
Foonkie Monkey’s Tips For Getting Your App Approved
Whether you’re just starting the before-mentioned submission process or you’re considering it, as experienced iOS app developers, we wanted to give you a few tips to make this process easier. We also want to help you secure one of the coveted spots on Apple’s App Store.
Test Your App Thoroughly: As you can imagine, Apple has no mercy with buggy apps that contain security hazards, performance issues, crashes, or full-out system failures. To catch any of these issues on time, make sure you have robust QA testing protocols in place. Whether manual or automatic, never overlook implementing testing procedures on every step of your development process, from start to finish. And, if your testing shows that your app has an unstable performance or some constant crashes and security hazards, fix them before submitting your app to Apple for review. Refusing to do so will surely end in your app getting rejected. It is a known fact that 25% of apps get dismissed due to performance issues.
Enroll in Apple’s Developer Program: We understand that paying almost $100 or $300 for a team each year to be a part of Apple’s Developer Program sounds steep. However–and we can’t stress this enough–it is worth every penny. Not only will you need it to deliver iOS apps, but you get access to all the tools and benefits mentioned earlier that allow you to showcase your iOS apps in one of the world’s most popular mobile marketplaces.
Guideline Compliance: Apple’s Interface and App Store Guidelines mentioned above are particular and are non-negotiable. Some of the UI guidelines are optional and leave room for creativity obviously, but overall, Apple is very picky about compliance with their App Store ground rules. They like their apps running smoothly and looking sleek whenever possible, so they will indeed reject any app that clashes with their design and performance requirements. Thus, we recommend you study these guidelines carefully and make sure your app abides by each of them before starting your submission process.
Compatibility: Apple loves when its users have several of the brand’s products and can use them in sync without a hitch. That’s why integration and compatibility is a crucial aspect of the brand’s success. For app developers, this fact means that cross-device integration and responsiveness in iOS apps are vital. For this reason, making sure your app is compatible with several iOS devices, not just the iPhone, makes a perfect case for your app to get approved. Again, we are not saying it’s a determinant of your app’s inclusion into the App Store, but it will be a point in your favor.
Original Design: This point probably may seem evident to you. However, you would be surprised by the number of copycat apps out there. It is said that for every two apps released, one is a copy of an original app. Luckily, the App Store is very good at rejecting unoriginal apps or apps that copy other apps’ design elements. Still, you must make sure that your app’s content is original and belongs to you. If some of it isn’t, you have to highlight it and give credits to the owner.
Key Takeaways
Submitting an app to Apple’s App Store for the first time can be both an exciting, challenging, and nerve-racking experience, all at the same time. And that’s completely normal, even for the most experienced developers. Submitting a brand new iOS app to Apple is stressful and time-consuming for anyone. However, it is not as troublesome as it seems once you get familiarized with the system and understand the requirements and how the entire submission process works. Sure, Apple is very demanding when it comes to opening its gates to any app. Nonetheless, as long as you pay attention, work hard, and have wholesome development processes and practices in place, as we do, you’ll be shipping countless iOS apps into the world for a very long time.
If you have any additional questions, concerns, want to know more about publishing apps in the App Store, or want us to develop your next iOS app, drop us a line!